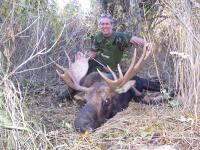
Skinning for a shoulder mount
Skinning for a Shoulder Mount
Preparing a shoulder mount cape for taxidermy purposes should start before the hunt does. Taxidermists have there own preferred method of skinning and it’s always wise to consult with your taxidermist before heading out.
In the field or at camp you should have a well sharpened knife or scalpel with spare blades, a sharpener, and lots of fine food grade salt.
Step 1: make an incision behind the base of each antler coming together in a “V” shape. From the center of the V continue the incision down the back of the neck to well behind the shoulder cutting from below the skin to help prevent cutting the hairs. One of the biggest mistakes made in the field is cutting the cape too short. It’s always better to have too much than not enough.
Step 2: Continue the incision around the girth of the animal.
Step 3: Make another incision approximately 6-8” down on each front leg around the girth of the leg.
Step 4: Starting at the back incision pull the skin upwards cutting at the tissue that connects the hide to the carcass. Continue skinning all the way up to the head.
Step 5: Cut the head off of the animal at the neck once the skin has been removed far enough to allow this. The head can be separated with a knife at the joint.
Skinning out the head can be intimidating to some and if the weather is cool and you are able to freeze the head or take it to your taxidermist quickly then feel free to use that option. Most taxidermists do charge extra for skinning out the head as it can be time consuming however the less damage to the hide the better the quality of your mount will be, not to mention, there is also normally additional charges for poorly skinned animals with lots of holes and repair needed. That being said there are times when one can’t get to a freezer or taxidermist and must skin out the head in order to preserve it. With a little patience and care this can be done fairly easily. Remember that as you cut through the connective tissue to cut against the skull and not the skin
Step 6: As you start to skin the head out make sure your knife is as sharp as you can get it. Once you get to the ears you will need to cut through the ear canal to free them from the skull. Always check both sides of the skin as you go to make sure your not about to slice through the skin anywhere.
Step 7: continue skinning up to the antler burs. Get as close as you can to the base of the antler working the skin free from the antlers almost in a prying motion from under the skin.
Step 8: Once you’re past the antlers and make your way down towards the eyes, use your finger on the hair side of the skin at the back corner of the eye as a guide so you don’t cut through accidentally. There is a membrane connecting the eye to the skin that you will need to cut to separate the skin. The tear duct (lachrymal crease) at the front corner of the eye needs to be cut as deep into the crease as you can. There is an orangey tissue connecting it to the skull where it can be cut loose.
Step 9: When you come to the mouth cut through the tissue connecting the lips to the jaw.
Step 10: Skin up to the nose and the cut through the cartilage freeing it from the skull. At this point the skin should be completely free from the skull.
Lips, Ears, and Nose
Step 11: Start cutting at the edge of the lips where you had separated them from the jaw. Slowly and carefully work your way around the lips turning them inside out.
Step 12: Notice where the ear cartilage meets the skin, make an initial cut and start to skin the back of the ear turning it inside out to the edge leaving the front ear skin attached to the cartilage. I would recommend visiting a taxidermist at some point to see if they could show these last few steps so you can have a better idea as to what I mean.
Step 13: Leave the nose cartilage attached at the nostrils skinning up to this point.
Next remove as much meat and fat from the hide as possible and it is ready to be salted
Salting
Salting is crucial in keeping the hide from loosing hair and epidermal membrane. Salt is cheap and can be bought in large quantities for under $10. Use fine salt and pour a fairly heavy layer over the entire hides flesh side. Rub the salt into the hide making sure to get salt in all the folds and every inch of the cape. Cover the entire hide with roughly 1/8 of an inch or more salt. Salt can only penetrate roughly ¼ inch thickness so for heavier hides use your knife to make a crosshatching pattern allowing the salt to penetrate. After the first salting fold the hide in half and put somewhere cool and dry overnight. The following morning the salt will be damp and sloppy, shake off the old salt and apply a fresh layer folding up again and keeping it in a cool dry place. At this point it is ready to be taken to the taxidermist when you are able.
The first step to a great mount starts in the field so if you are in doubt talk to your taxidermist. Save capes from previous hunts where the animals taken were less than trophy caliber and use these specimens to practice with. Immediate salting is the only way to safely prevent hair slippage.


